Learning how to play the recorder is a rite of passage for just about every elementary student. Playing recorder provides our students first steps in caring for an instrument, reading notation with an instrument, the personal responsibility of bringing an instrument to and from music to class, and creating time to practice an instrument at home instead of school. With all of these firsts, prepping for our recorder units is vitally important.
Scope & Sequence
Before we even discuss ordering recorders and materials, let’s consider some questions about the scope and sequence of your instruction. What grade levels are you going to teach recorder? Is it going to be something you touch upon in multiple grades? Teach throughout an entire year? Or are you going to devote 3-4 months of intense instruction to your students? Does you district curriculum require you to teach recorder at a specific grade level, or are you free to choose when you begin recorder? And while we’re asking the important questions, why teach recorder at all? These are all vital questions that will drive your instruction and what you will cover over time.
I know many teachers who begin recorder in third grade and use the instrument throughout the upper elementary years. I teach recorder as a fourth grade unit and devote a significant amount of time to its instruction as a readiness for instrumental music in fifth grade. If you choose to teach recorder, what do your students gain from it? What do they lose by learning it (e.g. what are you giving up to teach recorder)? Those two questions define why I begin recorder in fourth grade instead of third. Being reflective and purposeful about what you do and why you do it is important.
Setting Up a Timeline
You’ve worked through the tough questions, now let’s plan your work! I begin my recorder unit after Thanksgiving each year. It’s a purposeful choice, so that I have time to sing, chant, dance, play, create, and improvise with my fourth grade students before we begin the instrument. It’s important for me to establish (or review) the ways we make music in our room before adding a new way. Knowing I’m going to begin in December, by mid-October, I need to have my notes home to parents about ordering instruments, allowing me the month of November to place the orders, wait for shipping, sort and prep instruments, and have them ready for the week after Thanksgiving. I also know that I am going to allow a solid 10 weeks of instruction to recorder (basically, my second trimester).
I have a sense of how each week will be used and how I will close out the unit. What is your timeline for instruction? Will it be an intense short unit or will your instruction be interspersed throughout the entire year? Make a timeline of what you want to teach, when you’ll teach it, and what you need to do to make it all happen. Don’t worry if your plan changes as you go! Make some mistakes, get messy, take notes of things that didn’t go well, things you will change the next time. I’m in my 23rd year of teaching and still tweaking what I do and how I do it!
Ordering Recorders
Let’s talk about ordering those recorders. Each one of us will have a choice to make based on our student population. Will you have school instruments? Will your district purchase them? Building principal? PTA? If you choose to have your students purchase recorders, what is your school (or district’s) policy on collecting money? Does all money need to go through the office, or are you responsible for ordering things yourself? Do you accept checks, and if so, to whom are they payable to? So many things to think about! (And don’t forget to think about the shipping & handling fees!)
I am fortunate enough to teach in a community where the expectation is that each child will purchase his/her own recorder. I collect cash only from families then give it to my school clerk to make the order. Because I have no district or building budget, I charge an extra 25 cents per recorder to offset the cost of the shipping/handling fees. When you’re in the “Scope & Sequence” part of your planning, take a moment to check with your administrator or school secretary about how these have been handled in the past and what the expectation is for handling money.
Choosing a Brand
Finally, we get to talk about recorders! I think choosing a brand is one of the most important things you will do for your recorder unit. With that said, for most teachers, price is the determining factor when choosing an instrument. If price is a major concern, then check out the Music Is Elementary Renaissance Recorder or West Music Renaissance Recorder. Both are budget friendly and have good reviews from other music teachers within elementary Facebook groups. (Although I’ve read the colored ones may not be as reliable as the simple ivory ones).
If budget isn’t an issue, then I don’t think there’s any better choice than an Aulos or Peripole instrument. I personally love Aulos recorders and have an entire recorder consort of Aulos recorders. With that said, I don’t love their cases and they don’t come with a neckstrap.
We order Peripole Halo recorders for a variety of reasons – 1) they come with a great case, 2) they come with a neckstrap, and 3) they have a gorgeous tone (especially for beginners).
I know many teachers that use colorful recorders as an incentive to making learning fun and engaging. If that’s an option you want to explore, Kingsley Kolor Recorders are a great choice. They have a gentle tone, come with a nice bag, and are reasonably priced. Although they don’t come with a neckstrap, Kingsley does sell neckstraps separately and they do work with any recorder. I’ve paired Kingsley neckstraps with my Aulos recorders before and they’ve worked nicely!
Lastly, I really believe in everyone playing the same brand recorder throughout our instruction. Early in my career, I tried to accommodate students bringing in any recorder. The instruments ranged from Dollar Store finds to wood recorders. I didn’t mind the variance in brands as much as the variance in tuning. The same note could differ by a 1/2 step from recorder to recorder. We played often played in minor seconds instead of unison! It made performing with our instruments quite challenging, and I shortly moved to the “one brand” rule.
Sending Instruments Home
This is such a dilemma for so many teachers – to send the instrument home, only to never see it again! If you are providing a school instrument to ALL of your students, then of course, the instrument stays at school. But if the student bought the instrument, send it home. They need to practice. They need opportunities to practice the personal responsibility of taking an instrument home, practicing it, and bringing it back to school. And I get it, it’s not fun when 4-5 kids forget their instrument each day, but this is where it starts. We have to give them opportunities to practice being responsible and know it will be an imperfect journey for most.
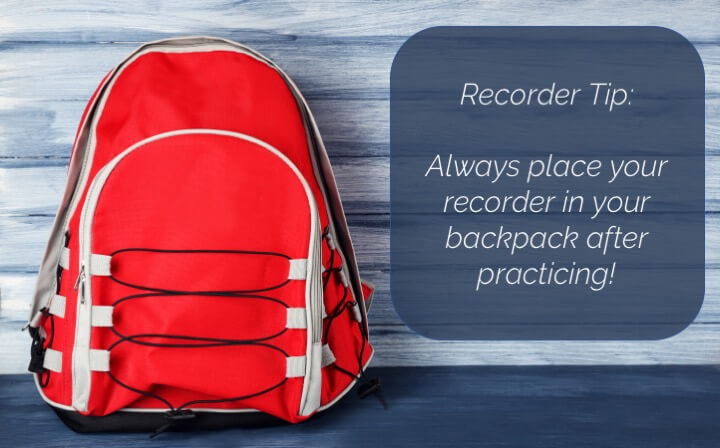
With that said, have a routine for students to know what to do with the recorders in every situation. Recorders go home on day one of instruction. Students are expected to practice 5-10 minutes the first few weeks. When students are done practicing, the recorder goes into the backpack/book bag immediately. The recorder’s home is the backpack. That way, not matter the day, the student always has their recorder with them. No excuses about the dog chewing it (true story), or the little sister hiding it (true story), or forgetting it at dad’s house because the child lives between two parents on a weekly basis (true story). The recorder’s home base is the backpack.
Labeling Instruments
Please have a system of labeling each recorder FOR your students. I can’t tell you how many times cases and instruments have been interchanged by friends simply because the instrument was not labeled. When the recorders come in, I take a Sharpie to each case and label it with the student’s first name and last initial. I also write the student’s initials on each strap. If you have a lighter colored recorder, then use the Sharpie to write their initials on the backside of the recorder. It saves so much time as we clean up to know who’s recorder and case belongs to each student.
Storing Instruments
Just as I have a protocol for where the recorder goes when it’s not being used (backpack), I have a protocol for where the recorder goes when it comes to school too. Each classroom teacher is given a medium sized plastic bin for their classroom. On music day, students are reminded to put their recorder in the bin. One student is designated to bring the bin to music class and then pass each recorder out to their classmates. Depending on the teacher, students may take the instrument back with them to store in their locker, or return it to the bin. At the end of the day, another student has the job of making sure the bin is empty and every recorder has been returned to its owner. If you keep your recorders at school, you’ll also want a system of organizing your recorders for your classroom. Whether a bin, or a peg board where recorders can be stored standing, make sure you’ve considered how to store instruments in and out of your classroom!
Choosing Materials
Once you’ve got your instruments, you’re going to need a Recorder Curriculum or Method Book. Let’s refer back to your Scope & Sequence. How are you teaching recorder? Is this a long-term activity, or a short, intense unit? That will drive your decision! Will you begin with the traditional B-A-G? Perhaps you’ll use the G-E approach to teaching and learning recorder. Many people love the concept of Recorder Karate by Music K-8. Students respond to the belts which serve as an external reward for practicing and achieving skills. I tend to use a blend of Recorder Karate approach (my kids will do anything for a belt) but with my own materials and songs. Which ever you choose, make sure you connect prior learning to the recorder for deeper understanding.
Assessing Students
Regardless of the curriculum you choose, the hardest thing about teaching recorder is creating the time to listen to and assess each student. You’ll have to use a blended approach – a bit of large group instruction with a bit of small group instruction and/or music centers. Consider using VoiceThread, Google Classroom, or iPads for testing. Students may log on to both and record themselves playing via audio or video. The downside is that you can’t give feedback in real time. You’ll have to dedicate time later in your day to listen to the tests, grade them, and write feedback for the students.
I decided many years ago that the best use of my time was listening to students play individually. I teach a mini-lesson at the start of class, then have students work in centers around the room helping one another as I listen to students play. I do use VoiceThread as an additional option, but I reserve the right to ask any student to play for me in person. As our unit comes to a close, I also allow for additional testing before school and/or during my lunch hour to ensure every child can reach their goal. One-on-one testing allows me the opportunity to help students address their most pressing needs and build their confidence about the things they are doing well. I can also direct them to other students who are struggling with the same content or to find another child who might have a strategy for mastery.
Final Thoughts
In my next post, I’m going to break down my approach to teaching my recorder unit. We’ll talk about the first few days of recorder, how to teach executive skills as well as notational skills, how to pace instruction, as well as differentiate instruction for all learners! Be sure to check back later this week! Questions about teaching recorder? Leave me a comment below! I’d love to hear from you!


I would love to hear more suggestions and tips from you. This is my first time teaching recorder, you have some wonderful educational ideas.
Thank you.
If you teach for 10 weeks, approximately how much time per class? I have 1 hour classes. Just curious as to your vision as I piece things together for the first time teaching recorders.
What to do with students who forget to bring their recorders to class?