
I’ve been teaching remotely all year. Although remote teaching has its challenges, I’ve also found some positives aspects too! As music has been remote since the start of the year, I decided to find new ways to engage my upper elementary students. I wrote DonorsChoose projects to put ukuleles in the hands of every 5th grader in my school. Every 4th grade student could safely play recorder at home, so we did our normal recorder unit. I wasn’t willing to forego our study of Saint-Saëns’ Carnival of the Animals in third grade either! But, I needed a way to reach my students both during class and during their asynchronous learning time. The solution? Digital Interactive Notebooks!
What is a Digital Interactive Notebook?
Honestly, it’s exactly as it sounds. It’s a digital notebook that students use to interact with the content. I use Google Slides to create my Interactive Digital Notebooks. Using images, videos, and links, students can use the Digital Interactive Notebook to access information anytime, anywhere. The lovely thing about Digital Notebooks is that I can make a portion of the notebook interactive using PearDeck or NearPod. Our district uses PearDeck, so I simply use the Add-On feature in Google Slides to make it interactive. I can assign things as a teacher-paced activity during our class or as a student-paced activity that can be done at their own pace or time after class.
What is in a Digital Interactive Notebook?
The answer is easy – anything and everything you need for instruction around a unit of study! For my ukulele unit, I included:
- Instructions about tuning (e.g. please don’t touch those tuning pegs!)
- Instructions and photos on how to hold the instrument
- Instructions and images about strumming
- Naming the strings
- Charts for basic songs
- Audio files for accompaniments
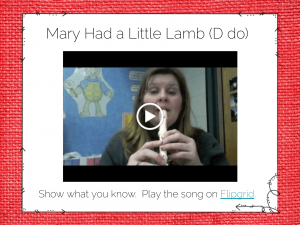
- Links to Flipgrid for assessment
- YouTube links for Play-Along Videos
- Chord charts
- Historical information about the instrument
- Videos of great performances
I found it really helpful to create a Table of Contents for each Digital Notebook. From there, I linked each topic to the slide, so that students could easily access the information they needed. I also included an Assignment Page at the beginning of the Digital Notebook. There, I could link each week’s assignment and assessment so students could access whatever work they needed to accomplish for the week.
For my recorder unit, I included:
- Instructions and photos about holding the instrument
- Instructions on how to blow and articulate
- Fingering charts
- Notation reminders (how to read notes on staff, etc.)
- Notation of songs
- Audio files for accompaniments
- Links to Flipgrid for assessment
- Video links for songs
- Historical information about the instrument
Using a Digital Interactive Notebook
The lovely thing about putting together a Digital Interactive Notebook, is that once you’ve put it together, you can use it over again each year. Simply make tweaks as necessary and assign! Depending on what your district uses, you can assign your Digital Interactive Notebook in Google Classroom or using a LMS like Canvas or Schoology. This gives each student their own copy of the book to use. Students can turn in assignments from week to week and you can return the notebook for their continued use.
Examples of Digital Interactive Notebook Pages
-
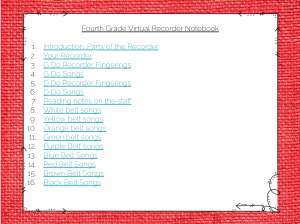
- Table of Contents
-
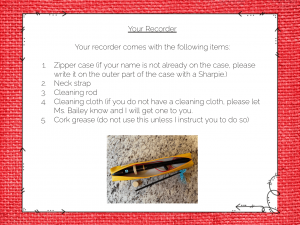
- Recorder Materials
-

- Recorder Fingerings
-
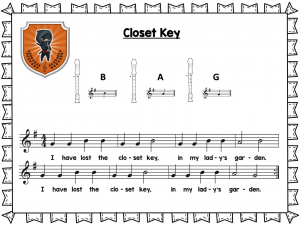
- Recorder Songs
-
- Recorder Videos
-
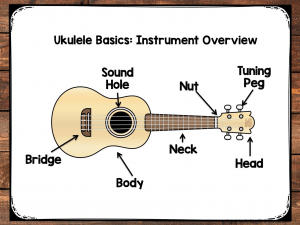
- Parts of the Ukulele
-

- Ukulele Song (from Sing & Strum Ukulele)
-
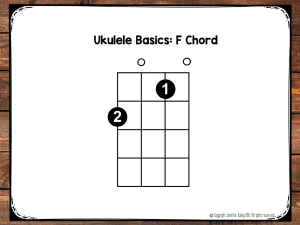
- Ukulele Chord Charts
-
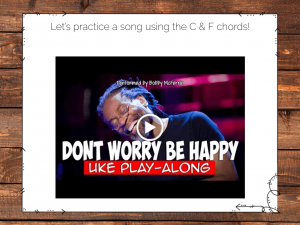
- Play-A-Long Videos
-
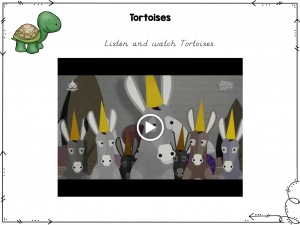
- Carnival of the Animals Videos
-
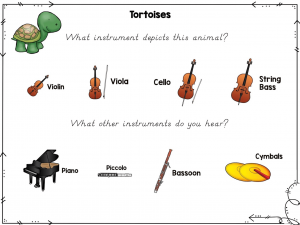
- Carnival of the Animals Instruments
-
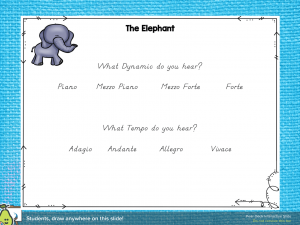
- Dynamics & Tempo
Related Posts


I love this idea! These seem like they are very versatile and would work with any grade level and concept. With the options for adding links to Flipgrid, audio directions, videos, and more, it also seems like these would be appropriate with students of all different learning styles.