

If you use Music Learning Theory, you know one of the main tenets of MLT is music aptitude. Dr. Edwin Gordon believed that each one of us was born with a specific aptitude for music. The amount of potential, along with experience creates our music aptitude. Through research, Dr. Gordon determined that music aptitude was developmental from birth through age nine, but at nine, music aptitude stabilizes.
Go ahead, read that sentence again. I’ll give you a little time to let that sink in.
Now that the shock has subsided, that means by 4th grade, a students’ music aptitude has stabilized and we move from potential to achievement. Yet one more reason to support music education in elementary schools, right? Dr. Gordon developed many music aptitude tests throughout his life. The two tests most appropriate for elementary students are the Primary Measures of Music Audiation (PMMA) and the Intermediate Measures of Music Audiation (IMMA). Both measure developmental music aptitude in students.
PMMA and IMMA
PMMA was Dr. Gordon’s first aptitude test for young children and was meant for students who were not receiving MLT instruction. It’s perfect for Kindergarten and First Grade Students as the content is a bit easier but can be used for students through Third Grade. IMMA is a more challenging test for students who receive MLT instruction. It’s normed for students in First Grade through Sixth Grade. I use IMMA for students in First through Fourth Grades.
Why Aptitude Test
Ok, so here’s the obvious question: WHY aptitude test? The only reasons to aptitude test is to inform and differentiate your instruction. If you know a student has a high tonal or rhythm aptitude, it changes the way you teach him or her. If you know a student has a low tonal or rhythm aptitude, you work hard to increase that child’s potential. It’s so easy to assume that an outgoing child is musically gifted and a quiet, reserved child is not. I can tell you from experience that you don’t know until you test. It’s important to understand that never are the results of the aptitude tests used to exclude a child. Never. They are always used to devise a plan of instruction to help students grow their potential to achieve.
Testing Tips
If you’re already PMMA and IMMA testing, check out my tips below to make the testing process easy!
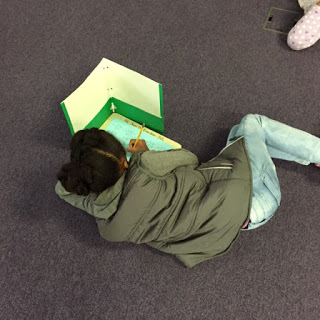
- Use test shields. (And by test shields, I mean a two-pocket folder!) This gives each student privacy as they test and keeps their eyes focused on their own paper. I buy a box of 1 cent folders from Office Max each year and use them for testing shields. Easy and inexpensive.
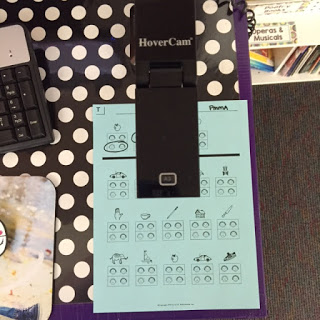
- Use a document camera for directions. I used to scan part of the test paper into my computer and show it on my interactive white board. But with a document camera, I can model how to circle answers on the test sheet (and how not to circle the answers). If you don’t have a document camera, see if a classroom teacher or IT will loan you one while testing.
- Color code the testing sheets. I don’t use the copies provided to me in the testing kit. I copy my own to prolong the life of the kit. I always copy test sheets on colored paper – blue for tonal and green for rhythm. Why? Well, to color code my stacks of tonal and rhythm papers. I’ve also found that the darker the paper, the less likely the images will bleed through from the other side.
- Before copying those test sheets, write the name of the test in the upper right hand corner. Although the PMMA and IMMA scoring sheets look similar, there are differences between the two. By writing IMMA in the corner, you’ll know you are using the appropriate testing sheet.
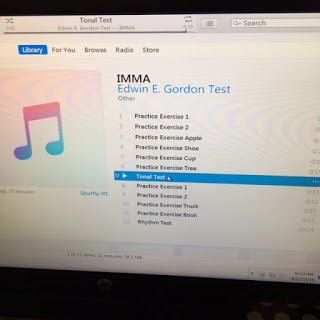
- Upload the CD into your iTunes library. It’s so easy to do and you’ll have the test at your fingertips. The best part is that if you have the test in your iTunes library, you can seamlessly play the practice items while using the document camera! If you hover over the iTunes icon, a mini menu will appear so that you can keep the document camera screen open while using iTunes.
6. If working with little ones, pause the test after the last item on the first page. After testing children for 20 years, I’ve learned that children don’t always realize there’s a back page. It takes them a minute to realize there’s more to go. I find pausing the test gives them a moment to get over the shock and gets them ready to move on. I’ve even squeezed in a movement break for wiggly classes between the front & back page.
7. If you have a students with focus issues, you may consider sitting with them while testing. I cover up the item we are listening to, then uncover it for the student to circle the answer. I’ve found that some students can’t focus long enough to listen to the two songs and will pattern mark to cover the fact that they haven’t paid attention. I’ve also included my resource teacher in the testing and had them come to support a child who needs one-on-one support.
I hope these tips help you to have a successful testing experience!
Related Blog Posts


I really appreciate your information, thanks for posting it.
Best of luck!
Lisa
Hi, Really appreciate your information. But the PMMA and IMMA online test is not available anymore.
Is there any other way to do the test online?