

One of my favorite teacher apps for iPad is iDoceo. What it is? It’s simply an amazing all-in-one gradebook, schedule. As a music teacher with nearly 500 students, there is so much to love about iDoceo. First, it’s on my iPad, which is always with me as I teach. Second, you can have multiple seating charts with photos. (That probably should have been first.) Third, all my grades are organized into one file and can be exported into Excel easily.
The only thing I haven’t loved about iDoceo was inputting student names at the beginning of each year. After typing EVERY name on the iPad the first year, I knew there had to be a better way. There is.
First Step
The first thing I want you to do is e-mail your school secretary and ask her for your class lists in Excel. Yes, she can do it. (Yes, it’s the beginning of the year and she might give you a hard time.) Ask anyways! It takes her 30 seconds to do it. Now go get her a Starbucks to say thank you! (Always take care of your school secretary. She just saved you hours of time!)
Prepping Your Excel Sheets
Once you have your Excel spreadsheet, you are going to do need to do a little prep work. Each class has to be it’s own file. So copy and paste each class list and save it as its own file. While you are doing this, make sure the student names are in one column and that you have a header called “Name.” This is super important when you get to the import of your Excel files! I like for my names to be Last name, First name so that my lists are alphabetized. You can organize your lists however you like. Second, if you know what assessments you are going to do this year, you can also add them in your spreadsheet. I highly recommend doing this to avoid typing every assessment into every class list later in the year. You can always amend/change/add assessments later, but it’s good to have a few in there.
Save Your List via the Cloud
Once your class lists appears the way you want it, I would encourage you to save them either via Google Drive, Dropbox, or iCloud storage. You can access all 3 via iDoceo. I use Dropbox for everything, so I saved my files in a folder called 2016-2017 Class Lists. It used to be that you had to save the file as a .csv file (common separated values) but iDoceo has made some improvements in the last few years that allows you to import directly from Excel.
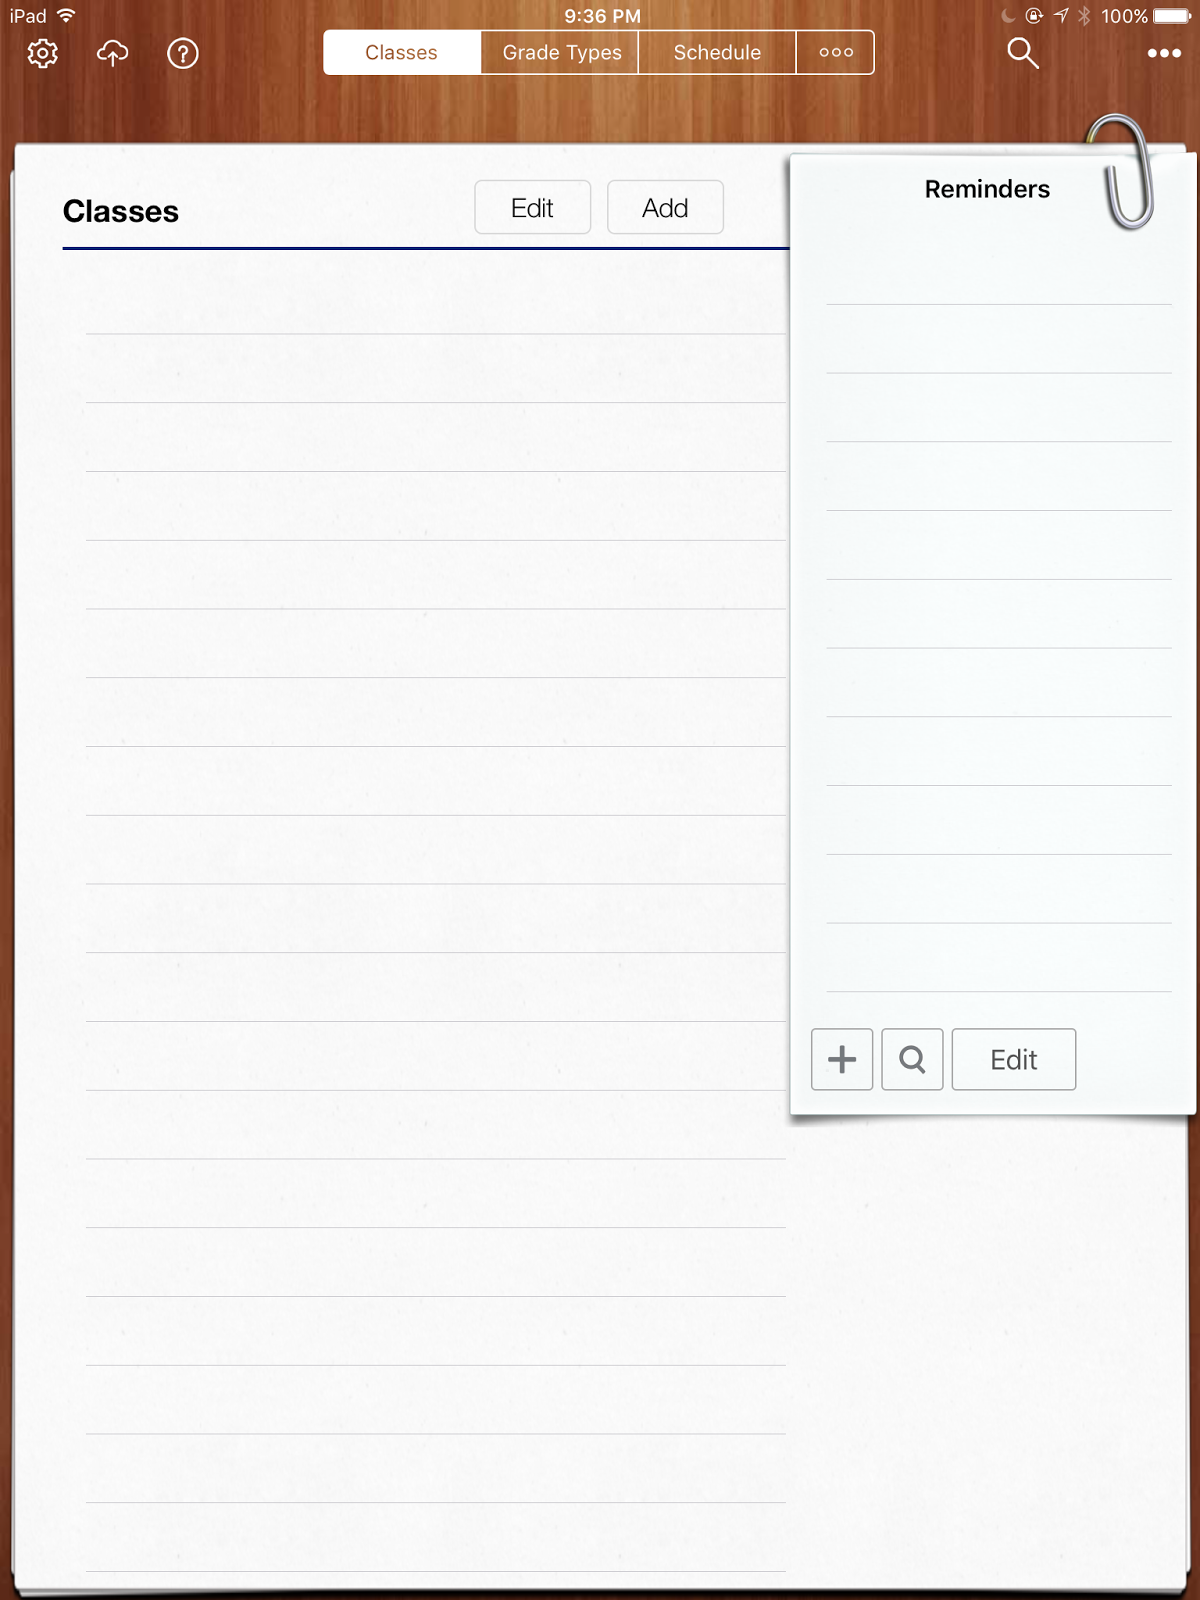
Now it’s time to get busy on your iPad! Open up iDoceo and you will see this screen. Not very exciting, is it?
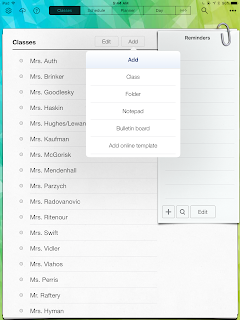
See the button that says “Add” in the top right corner? Click on it. You should see a menu pop up with things you can add. Click on Class so that you can create a file for each teacher’s class list.
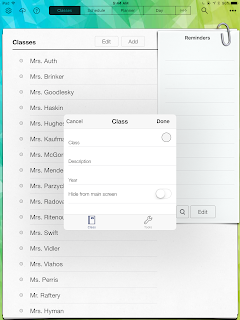
Another frame will appear. Where is says Class, type in the teacher’s name. iDoceo likes to alphabetize. If you type Mr. or Mrs. Disney, it’s going to alphabetize by the M. Better to just type last names so that it alphabetizes your teachers’ names in a way you can easily find. them. (Learn from my mistakes…) I also add the grade level under Description and school year under Year. All of my grade books are exported at the end of the year. These tags help me to find what I’m looking for easily.
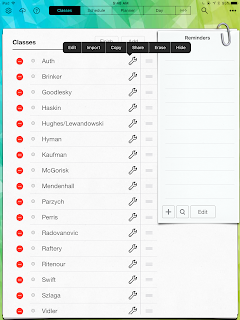
Once you have added your teachers’ names, your home screen will appear like this. Much better, eh? Now it’s time to import those Excel files.
Click on the Edit button right next to Add. When you do, your screen will appear like this. Do not panic.
If you click on the little tool to the right of the teacher’s name, you will see another menu appear. Do you see the Import button? This is where the magic happens. Click on it!
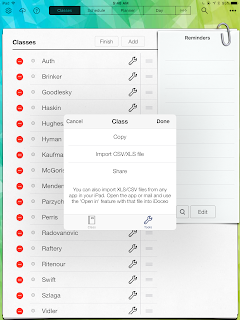
Another menu pops up. Click on the csv/xls option. That’s going to allow you to import your class list from your Excel spreadsheet.
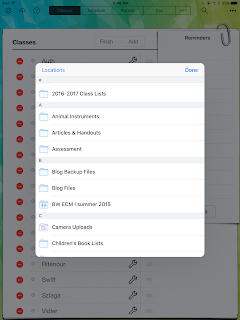
Now you need to tell iDoceo where to find the file. My iPad defaults to iCloud, so if I were using Numbers, it would be easy to locate my class lists. Since my files are on Dropbox, I need to click on the Location button in the top, left corner. When I do, it gives me the option to locate files in Google Drive or Dropbox. I selected Dropbox because that’s where I saved them. You can see my 2016-2017 Class List file below.
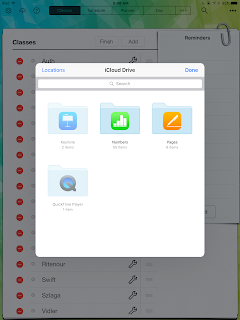
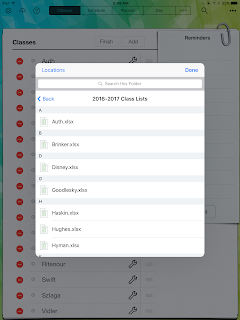
When you click on the folder, all of your individual Excel files appear. Click on the class list you want to import.
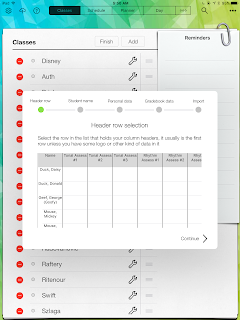
Now that I have selected the class list, I need to answer a few questions about the file. iDoceo will ask you to identify the column that has the names of the students. It will ask you to identify any personal data about the students (student number, address, etc.). I don’t include that information, so just click continue. Lastly, it will ask you to identify any gradebook data. This is why I include my assessments in the Excel spreadsheet.
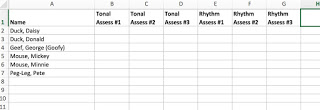
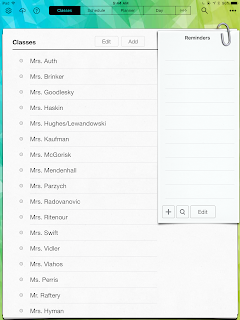
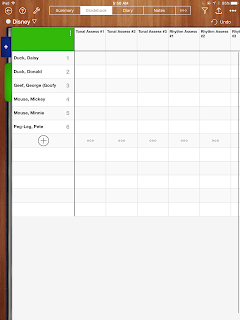
When I’m all done, I have beautiful class lists that look like this! Now all I have to do is add photos of each child and create my seating charts! So easy, right?
Related Blog Posts


This was extremely helpful! Thank you! The only thing I would add is to make sure you have the word "Name" in your first row of the Excel spreadsheet when you're preparing the file. Otherwise the first student will get cut off, and you'll have to go back and edit them all (like I did!).
Oh no Katie! I show "Name" in the header in the spreadsheet, but you are right! I will explicitly add that to the directions! I'm so sorry that happened! 🙁
This comment has been removed by a blog administrator.